Picture frame MAKEOVERS are an easy DIY project!
They are an inexpensive way to display your MEMORIES and bring beauty to your home. They also make great GIFTS.
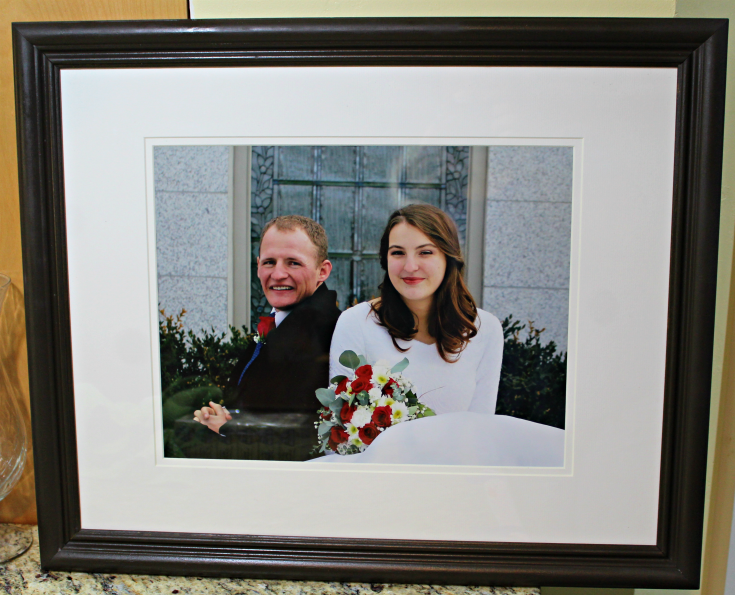
Last week I had pictures printed for a senior collage. While I was looking for pictures I came across my daughter’s wedding photos and decided to print a few of those. I thought giving my daughter and her husband a photo of their wedding would be nice. Then another thought crossed my mind...getting a framed picture they could immediately hang on the wall would be even NICER!
While I was waiting for the pictures to be print I walked around Hobby Lobby and just LOOKED. They had multiple sizes of mats and frames were 50% off (which I thought was fabulous) but I still wasn’t quite ready to spend $30 on a frame.

In our move I had given away several very nice frames that I was tired of storing. Remembering them inspired me to checkout the thrift store and see what I could find there. I wasn’t exactly thrilled with what I found but I picked this one out for $3 and brought it home.

I also went back to Hobby Lobby and bought a mat that ended up costing just $3.17 with a coupon.

At home I disassembled the picture and thoroughly cleaned the glass.
NOTE: This may have been the hardest part...this and trying to get it back together without any lint or particles showing up under the glass. UGH!!!!

I decided to use a chalk type paint on my frame and then debated whether or not to change the base color before I painted it the final color (in case I wanted to distress/sand it).
I ended up NOT giving it a new base color and as far as prepping the frame I only lightly sanded a couple of deep scratches with 220 grit sandpaper. That was it!
I created my chalk type paint by mixing 1 tsp. plaster of paris, 1 tsp. water and 1 tablespoon paint (I used an acrylic paint because it's what I have on hand). My color was dark chocolate by Ceramcoat.
I applied 2 coats of paint. (The first coat wasn’t solid and I had decided I didn’t want the base color to show through.)
This was plenty of paint for the frame. I could have painted a whole other frame besides this one with the amount I had.
When I was finally satisfied with my painting I let it dry.
NOTE: The paint did have a little trouble sticking to the gold edge. I decided I didn’t mind if the gold showed through so I painted it as best I could and then didn’t worry about it...I even thought about wiping the brown off of the gold.

Chalk type paint has a dull finish. One of the fun things about it though is you can apply wax and the whole look changes. Wax gives the paint a glossy finish that is quite pretty. I have yet to buy any wax but I have found coconut oil works too.There may be reasons to use a wax but I have been happy with my alternative so far.

May 13, 2019
I love this too. I have gone to garage sales and picked up all sorts of frame shapes and styles to make a picture wall! I haven’t tried the chalk paint, but it’s good to know since chalk paint can be pretty pricey.
May 15, 2019
I do love your picture wall!