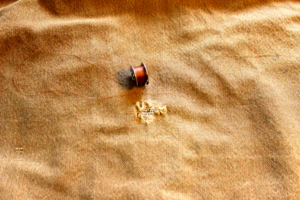
(Note: These are my husband’s work jeans. Technically they aren't denim but duck cloth. They need fixed and the process is the same so I am using them for my example. Also, I could have / should have fixed them sooner…)
I had an epiphany as I began writing this.
It is fashionable among some to wear holey jeans. So this post may or may not be applicable or appreciated by all.
I could write a HOLEY JEANS DIY post but I don’t think I will...at least not today.
What I WILL DO here is give you some ideas of how you can extend the life of your holey jeans if you want to create or preserve them.
Back to my EPIPHANY...FASHION if given enough time,
(which just in my lifetime, has gone from pristine indigo denim to faded, acid washed, distressed and now holey)
may just continue on around to repaired denim becoming "the fashion" or fashionable.
(I am not talking socially accepted...I think we are already there. People wear whatever they want.)
By FASHIONABLE, I mean designers will create jeans, make them holey and then repair them as part of the construction process for their high FASHION jeans.
I guess we will see... keep in mind you heard it here FIRST! Ha!
ON TO THE TOPIC AT HAND...
My GOALS in repairing denim:
⇒Extend the life and usefulness of an item.
⇒Minimize the visual impact of the repair.

***FIRST AND FOREMOST***
The sooner you fix a hole the better. Repeated wear and washing will make the hole bigger. A smaller hole is less work to fix.
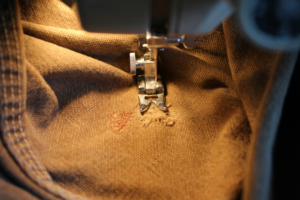
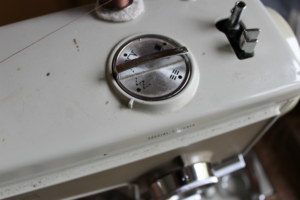
Set your machine to a wide, multiple stitch zigzag and a short stitch length. This will give stability to your denim. When a piece is cut or gets a hole, it begins to unravel or fray.
STABILIZING the fabric STOPS the FRAYING.
I like fraying on my circle quilts so I stitch or stabilize the fabric a bit back from the edge to allow it to fray a little.
*If you want HOLEY denim but don’t want it to continue unraveling and coming completely apart through wear and washing, sew a small zigzag stitch around your hole. It will stabilize the fabric and help it stay together. Backing it with another fabric will make it even stronger and last longer.
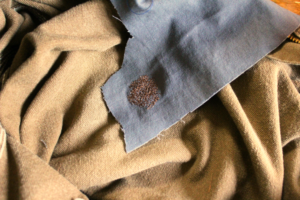
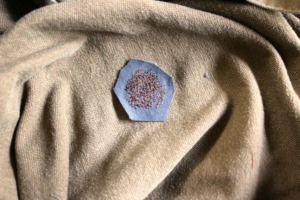
BACKING FABRIC works well for stabilizing denim. Use it for gaping holes. Be sure to keep the backing fabric flat. A pucker could feel odd and possibly look odd. Don't cut off the frayed ends. Fold them over and stitch them down to help hide the backing fabric and blend in the stitches. Backing fabric adds thickness to a piece. This is great when you’re fixing holey knees.
NOTE: Use a larger piece of backing fabric than you think you will need.
It may slip and you want to be sure it is large enough to catch what you need it to. Trim it after you finished stitching.
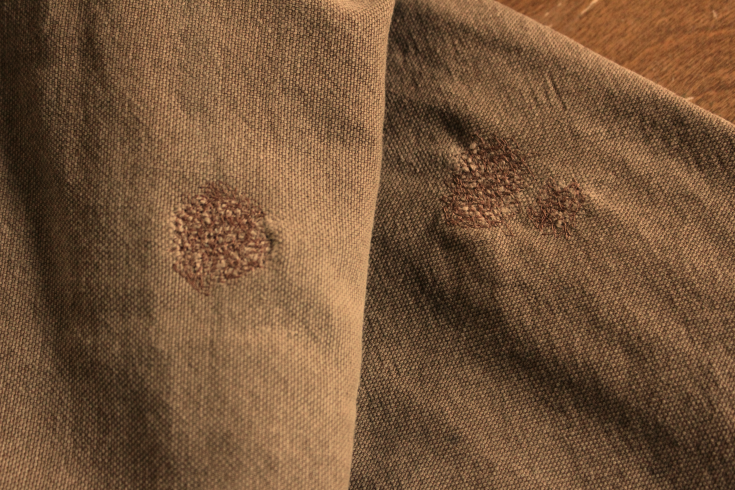
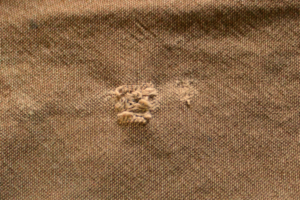
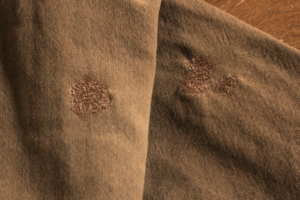
You don’t need a backing fabric if a hole still has a few fibers running across or if it is small. Just sew a zigzag back and forth until the hole is completely stabilized and there are no loose ends. Sometimes an unbacked piece will bunch a bit without the backing fabric. You can see this in the completed repairs in the bottom picture. The left repair was stablized with fabric, the right was not. The fabric has a wave to it.
NOTE: A mass of stitching can sometimes cause your soft denim to become rigid and rough...keep in mind the location of repairs and the sensitivity of the wearer.
Try you hand at REPAIRING DENIM...
When it becomes the next big fashion trend YOU WILL BE READY!
Until then, you don't have much to loose and new life to gain...the new life of a pair of jeans which one day may be your most fashionable & favorite pair of jeans.
Future DENIM REPAIR posts will cover double front and double knee jeans. These durable repairs don't necessarily look like repairs. They can appear like they were part of the original construction. They are more work but look nicer than the quicker fix in this post.