START SMALL with something like a changing pad, table runner or small quilt. It will give you a chance to get acquainted with the process without getting overwhelmed. Large quilts are amazing but have their challenges.
⇒CUT OUT CIRCLES.
This may be the most daunting part. It’s why I suggest starting small.
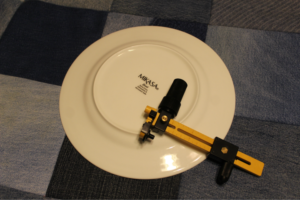
My first circles were made by tracing an ice cream bucket lid. Many people use PLATES. After making several quilts, I invested in a MECHANICAL CIRCLE CUTTER. This improved the process but still had its shortcomings. ( Denim is a much heavier fabric than the cutter was designed for.) An ideal method for cutting out circles is to use a DIE and press. It is the most accurate method for cutting circles but also the most expense. Pre-cut denim circles can be purchased on the internet. I paid my children to cut them out for me...it was a WIN-WIN!
⇒MARK A SQUARE within each circle.
To figure out the size of square, fold the circle in half and mark the diameter points on the outer edge of the circle. Fold the circle again, this time matching up those points and marking the new outer edge diameter points. These marks will be equal distance apart. Connect these points on the circle’s outer edge making a square.
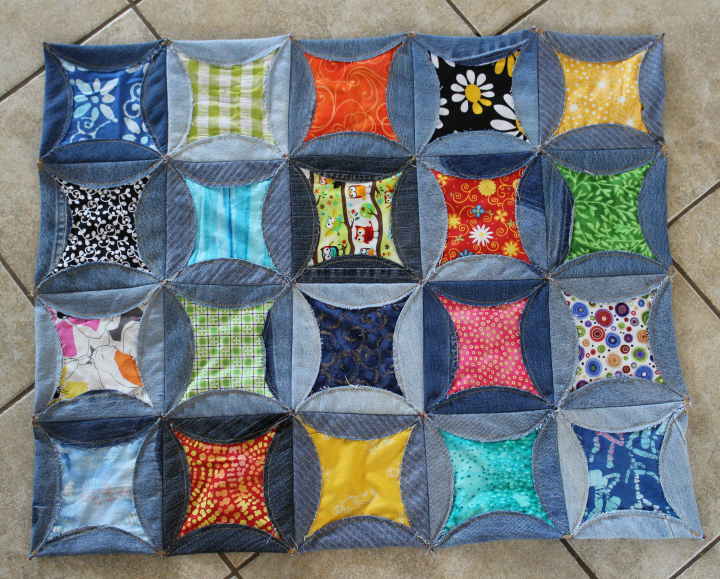
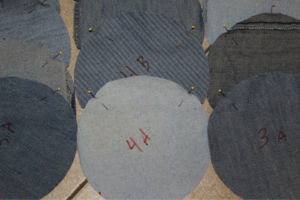
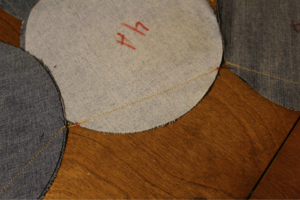
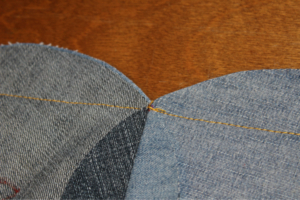
Use this square to make a template and mark all circles. Mark the circles on the wrong side of the fabric. (Right sides are sewn together and you need to be able to follow your lines.) My template was cut out of a cereal box. Originally, I would mark out a complete square as you can see in the picture above. I suggest you do this on your first quilt. It makes sewing a straight line on a curved edge much easier. Now, I stack my circles up, set the template on the top and draw a line down being sure to hit every edge. I have gotten pretty good at eye-balling a straight line. Denim is a forgiving if I am a bit off. I use a high quality, washable marker to mark everything. I have also used pencil and pens because it’s denim and heavy and I am marking it on the wrong side.
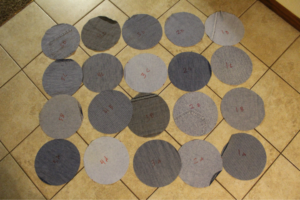
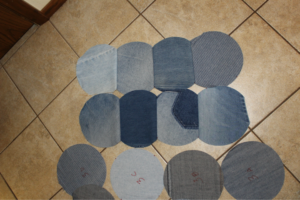
⇒LAYOUT your denim circles.
This step may take some time to get it just the way you like.
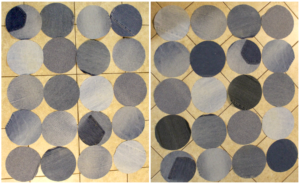
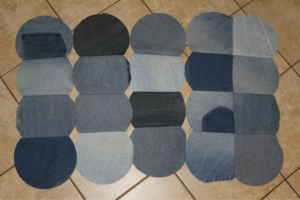
LEFT: I used circles leftover from a previous quilt. It had light and medium denim but was missing darker denim. The layout is not bad for what I had to work with. RIGHT: I cut out 4 more circles from 2 pair of darker jeans and included them. I really like the wider color range. I feel like it makes the finished squares pops.
Placement is key. A good looking quilt is never random even if it appears to be. You can use color gradient and go from light to dark or do something that looks random and pops. Don’t leave this step to chance. Be sure you are happy with your layout so you will be HAPPY with the FINAL PRODUCT. It’s NOT a difficult process but it takes time and it’s too much work not to be completely thrilled with your quilt in the end. Note: Dark denim and light denim seem to be the most challenging to find.
⇒FLIP YOUR CIRCLES & PLOT A GRID.
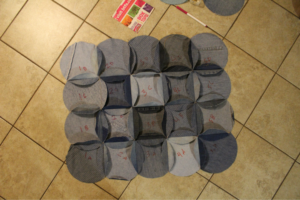
Flip the circles, wrong side up(keep the order) and make a grid on them so when you begin to sew it’s easy to keep all the circles in the right location. I use numbers and letters.
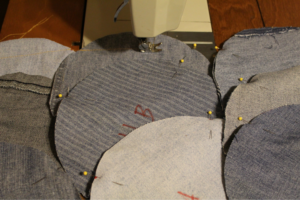
⇒ PIN EDGES and SEW COLUMNS.
I use a method of production sewing. I pin a whole column together at once. I do that with several columns so I can use a method of chain stitching. I start sewing and just keep a continuous seam going. I don’t have to mess with holding the threads down each time I start on a new column and then stop and cut threads. I just rotate through the columns. You can back stitch to lock the stitching.
Note: I use heavy weight topstitching thread for all my denim sewing. It allows the construction to match the durability of the fabric.
⇒LAY SEWN COLUMNS OUT AGAIN.
I do this to keep them straight. It’s easy to mix them up. Yes, this is the voice of experience speaking!
⇒PIN COLUMNS TOGETHER and SEW.
Keep right sides together. Open up seam allowances and pin through the center seams. This keeps the seams lined up well.Be sure to catch the very top of the your first seam as you sew.