LINED HANGING BAG TUTORIAL…EASY PEASY!

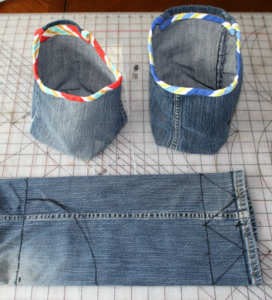
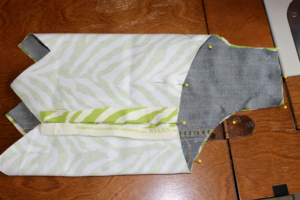
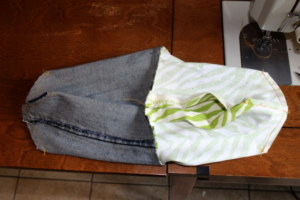
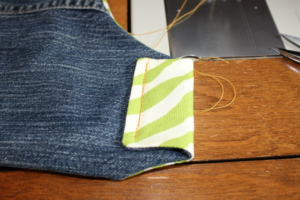
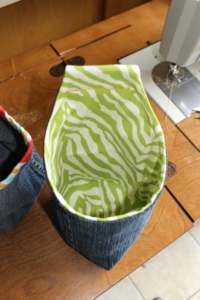
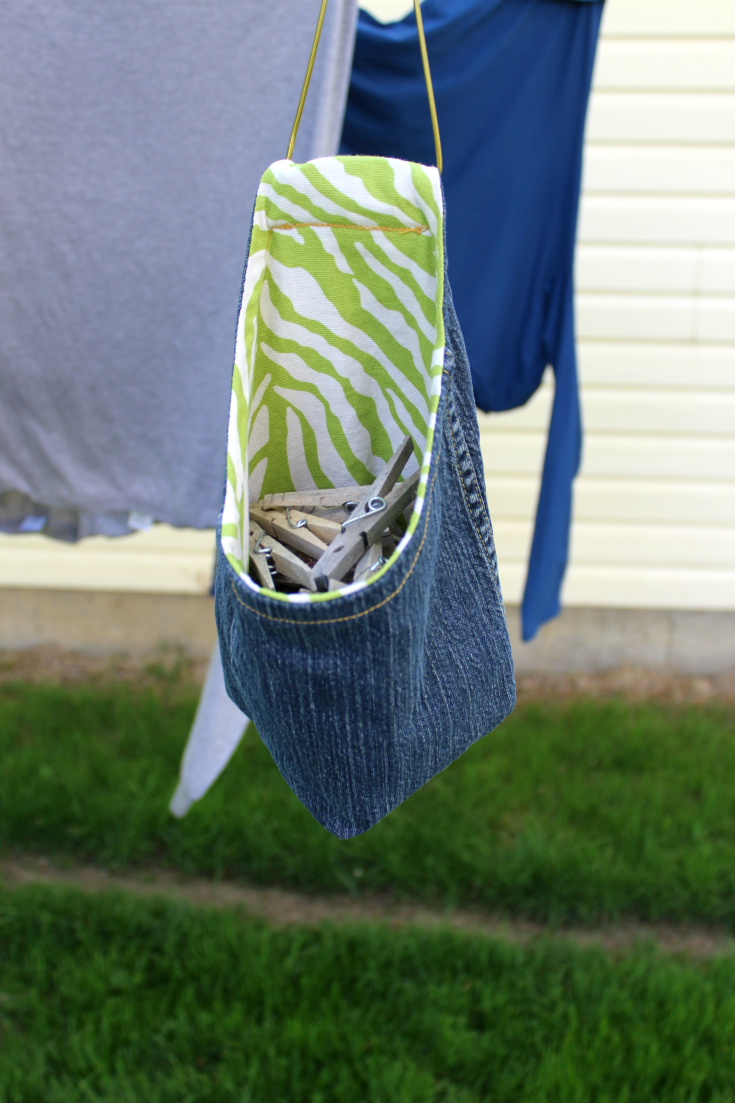
I LOVE the look of this LINED HANGING BAG!

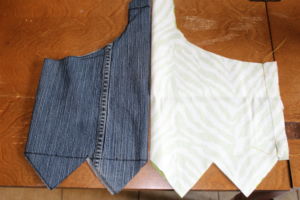
The CONTRASTING lime green zebra LINING gives the bag a FUN FEEL...just what laundry NEEDS!!!

(Set a mood with your lining...)

Despite adding a SuPeR CooL lining to the hanging bag, this tutorial SIMPLIFIES how to make the bag opening and hanger by

MARKING it out while the pant leg is laying flat...BEFORE any cutting or sewing takes place.

**I am going to STREAMLINE this tutorial a bit...you may want to REVIEW my first HANGING BAG TUTORIAL.

I want to HIGHLIGHT how to simplify the hanging bag by drawing out the pattern on the jean leg AND how to add a LINING.


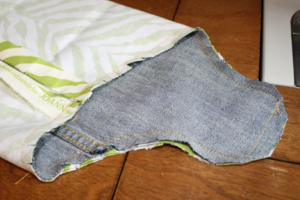
⇒LAY PANT LEG FLAT, DRAW OUT THE BAG & CUT OUT.

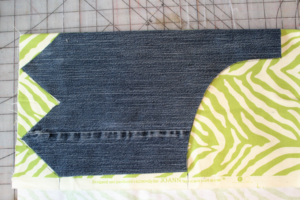
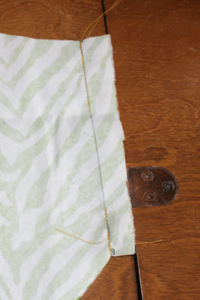
  • Draw bottom line. Divide in quarters & mark.

  • Draw a line parallel to your first line at bottom. Make it the same distance as what you have between quarter marks. Mark the center of this line.

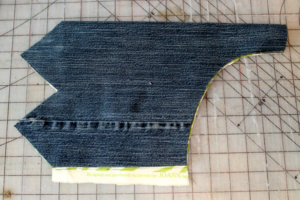
  • Draw out the W. (This becomes the bag bottom)

  • Measure up from the bottom the depth you want the bag and mark. (Add top & bottom seam allowance to height)

  • Choose height & width of hanger.  This is the rise from the front opening edge and will be marked on the opposite edge. (Be sure to account for a fold)

  • Draw opening, then cut out on lines.


NOTE: The opening is DIAGONAL to the hanger. If you cut the bottom W out and shifted the W to become an M, then measured and draw the opening and hanger for the bag will be PARALLEL to the hanger.

CUT OUT LINING.

  • Fold lining fabric and lay denim on top of it.

  • Add a seam allowance.

  • Cut out.

SEW LINING SIDE SEAM. Leave an opening in the seam so it can be turn right side out through it. Mine was a few inches long.

NOTE: I put the lining seam in the very front where it is least visible there.


⇒SEW LINING & DENIMright sides together.


⇒CLIP EDGE.

SEW LINING & DENIM bottoms. Right sides together...independent of each other.

⇒STITCH LINING HOLE CLOSED.

TURN RIGHT SIDE OUT through to opening in the lining.

SEW HANGER DOWN & top stitch around the opening (if you want).

WASH
&
YOUR DONE!

I have completely enjoyed making these LINED HANGING BAGS!

I still have few more things I'd like to share with you about hanging bags. I am not sure if I will finish it off next week or take a break and jump to SOUP BOWL COZIES. So heads up...both are coming soon.

I hope you take the time to PLAY with

LINED HANGING BAGS, learn something and totally ENJOY yourself in the process!

Leave a Reply

Your email address will not be published. Required fields are marked *

This site uses Akismet to reduce spam. Learn how your comment data is processed.

Scroll to top