As I write this, MY MIND continues to whirl with NEW IDEAS and variations of the HANGING BAG.
( I will save these new ideas for another time.)
I have a few more things I want to share before I move on to BOWL COZIES.
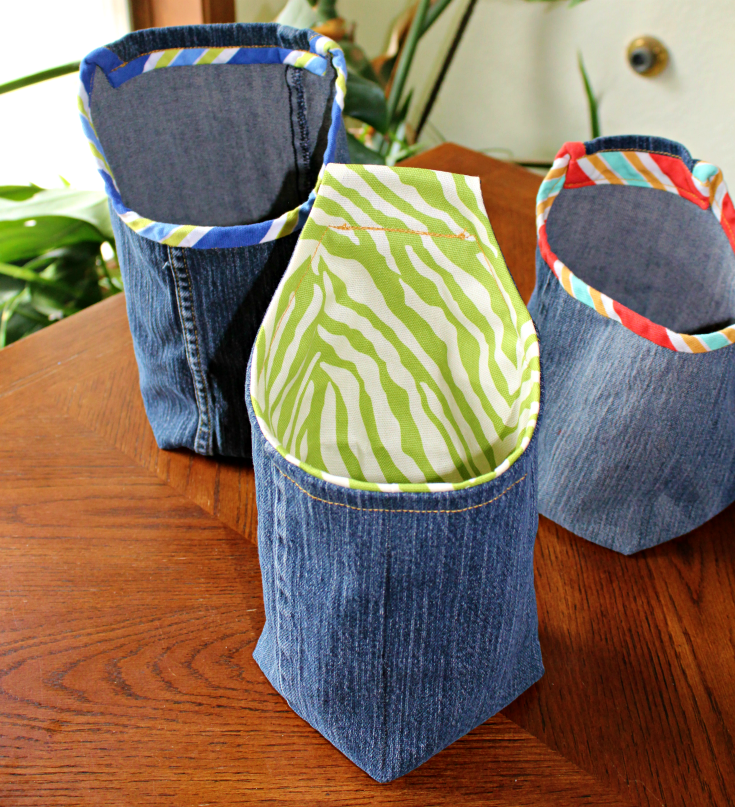
Hanging bags are a GOOD use for STRETCH DENIM.
I have hesitated to use stretch denim in quilts because they’re usually thinner than traditional denim AND I worry they won’t hold up as well to the years of rigorous wear and tare that I want a WELL LOVED quilt to take. I am not saying you couldn't use them for a quilt, only that I tend not to use them for quilts.
I have decided STRETCH DENIM is great for
SUPER SIMPLE SACKS and HANGING BAGS.
Stretch denim makes a LIGHTWEIGHT bag that is easy to sew and still plenty DURABLE. Less bulk and the ability to stretch makes finishing out the edges easier too. Being able to fold the edge back on itself without the need to clip, makes the edge stronger.
To COMPENSATE for the thinner stretch denim, I used edge finishing techniques that added fabric and support to the edge so they natural hang open better.
Adding the BIAS strip around top of the bags stiffened their openings.
(2 different TECHNIQUES were used to apply the bias strip to the edge to these 3 bags. )
The SMALLER (2) BAGS there sewn right side of the bias strip to the right side of the bag and then turned to the inside of the bag. The loose edge was then folded under, pinned and stitched in the ditch from the outside.


The BIGGER BAG was originally this bag with the towels in it from my first post. I decided to cut it down and experiment with making it shorter.
The edge TECHNIQUE I used for this bag consists of folding the bias in half (wrong sides together, right sides out), pinning to the wrong side of the bag & stitching it. The last step is to turn the bias to the outside and stitching it down. This TECHNIQUE creates a nice crisp edge with the denim on the inside and the colored fabric on the outside.
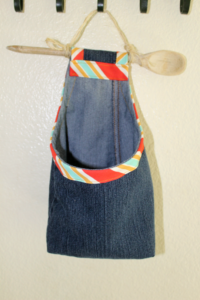
Adding a LINING is another way to stiffen a bag edge. It looks GREAT and adds BODY to the whole bag not just the opening.
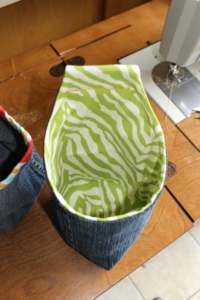
Checkout the tutorial here...
LINED HANGING BAG TUTORIAL.
Bags with BOTTOMS DIAGONAL to the HANGER:
(If you need some clarification check out my first HANGING BAG TUTORIAL.)
-
Changes center of balance...causes the bag to lean forward (more than with a parallel bottomed bag).
-
A narrower hanger will tend to let the bottom lean or roll to one side or the other when hung against a wall.
-
A wide hanger (about half the opening width) reduces the tendency of the bottom to roll to one side or the other when hung from a wall.
Bags with BOTTOMS PARALLEL to the HANGER:
-
Lay flatter to the wall.
-
A wide hanger tends to hold things more upright.
I have finished my "few more thoughts" on HANGING BAGS and I am going to let them set and steep for a bit.
I have quite a collection of HANGING BAG posts now.
If you would like to see them all, click on the hanging bag TAG at the bottom. You will be able to see the how my thoughts and experimenting progressed.
*Up next, just in time for those summer parties, BOWL COZIES...they're not just for soup anymore!